I have been flying a Genius CP (DEVO) with a 9x for a few days now and while I probably don’t have all the issues worked out I figured it’s time to post some information. This will be a continuous work in progress.
BEWARE, the MTC-01 is known to be flaky at times and especially running this nonstandard configuration it could be dangerous. This is for informational purposes only, everything below could be incorrect, don’t try this at home.
First a quick start for the impatient:
- Models created to be used with the MTC-01 should use a 23.5ms frame time with 400us pulse separator length. Do not use more than 8 channels (less is better) and if you’re using an old MTC-01 with the original firmware it is a good idea to set any channels you’re not using to -100 to help prevent the “channel mixup” issue. Newer MTC-01’s don’t have this problem.
- Binding requires first plugging the MTC-01 into your 9x, then turn on the DEVO RX, finally turn on the MTC-01. MTC-01 should have a solid blue light and the DEVO RX should have a flashing light.
- Next wiggle the stick, switch, or whatever that is on channel 2. The MTC-01’s blue light should start flashing. Within a second or two the DEVO RX’s light should go solid.
- Wiggle the stick on channel 2 again. Now the MTC-01’s green light should start flashing. Within a second or two the DEVO RX should initialize (on my Genius CP the heli “comes alive” and wiggles the collective at this point).
- Now you’re ready to fly.
Once bound if you do not power off the MTC-01 then it will rebind to the same RX automatically without having to go through the steps above.
Apparently there are two versions of the MTC-01, the new one just being released recently. Lets call these v1 and v2. I do not know what the differences are but there are hardware changes and probably firmware. Supposedly the v2 fixes some issues with failsafe and possibly the “channel mixup” issue. There is also a new firmware for the v1 that fixes the “channel mixup” issue but it’s unclear if that actually fixes it or not.
The channel mixup issue is where the MTC-01 will get out of sync with the PPM stream and start transmitting the wrong channels to the receiver. In other words the channel order gets mixed up. Obviously this is very bad and dangerous when flying.
The failsafe issue comes in to play if you disconnect a v1 MTC-01 from your radio while it’s still powered on. Apparently it can start sending random channel data like full throttle to your model. If that happens you need to turn off the MTC-01 as fast as you can, this will hopefully send your DEVO RX into its own failsafe mode.
My MTC-01 is a v1 and it also runs the old buggy firmware. This is all I have experience with and is what all my testing has been done with. I would be happy to try a new v2 MTC-01 or upgrade the firmware on mine if someone sends me one of the v2 MTC-01’s and/or a DP02 firmware upgrade cable.

Alright, lets get into the details.
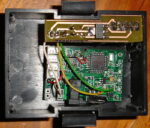
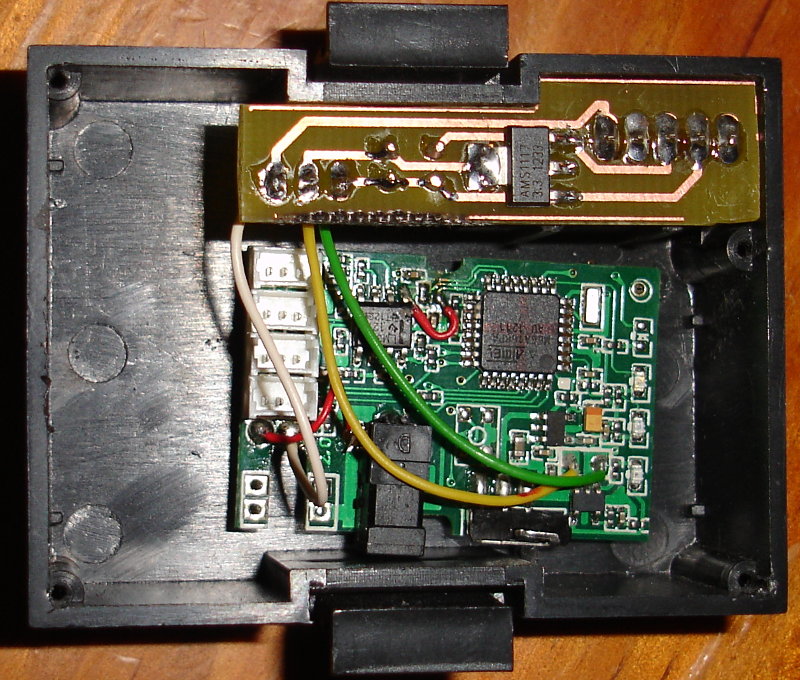
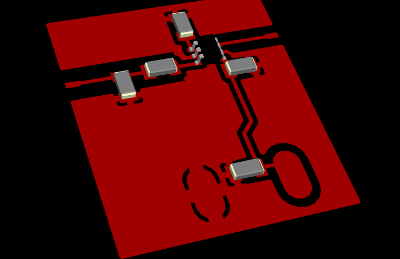
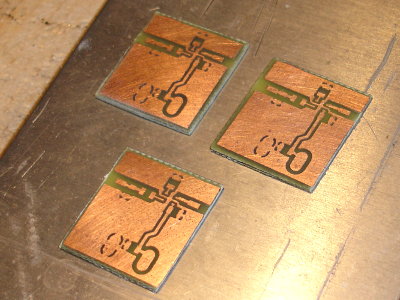
The first thing that needs to be done is to connect the MTC-01 to the 9x. The MTC-01 comes with a cable that can be plugged into the 9x’s trainer port and this works fine. However, I put my MTC-01 board inside a 9x style TX module. This gives me a little more range because of the better external antenna and I power the MTC-01 from my radio so I never have to worry about its battery. I built a small PCB that has a 3.3V voltage regulator to supply power and connect to the 9x module pins (make sure the regulator can handle the full battery voltage from the radio). The audio plug needs to be removed from the board for it to fit in the case. The internal antenna can be removed and coax soldered in for an external antenna. I’m thinking of adding an RF amplifier in there as well to get a power boost and more range.
Once the MTC-01 is connected to the 9x now we need to create a model. I’m using er9x on my 9x which gives great control of everything. Other firmwares may be slightly different or possibly not work at all if they can’t be configured properly, let me know.
Some adjustments need to be made to the PPM signal for the MTC-01 to recognize it. The frame length should be no longer than 24ms. I use 23.5ms. The most important setting is the pulse separator length should be 400us. The MTC-01 will also accept 350us but I have had problems with glitching when using that timing. My WK radio actually uses around 423us so I’m not sure how precise this value needs to be. On the v1 with the old firmware my guess is the channel mixup issue is caused by the PPM frame sync pulse not being long enough so if you use too many channels or too many channels have long enough pulses then the MTC-01 goes haywire and loses sync. To avoid problems either run less than 8 channels or with 8 channels I run the longest frame time I can and I set any channels I’m not using to -100 which makes their pulse as short as possible therefore giving a longer sync pulse.
See the quick start above for binding information.
Well, that’s it for now! Simple right? Now the hard part,

, I will make a follow up post below to describe how I set up my Genius CP to work with my 9x.
Attached are two er9x models. Note these are a work in progress and not fully tested. The “beginner” model basically uses less throttle in its curves and more expo. These settings are based on some recommendations I found for DEVO radios (here, here, and here). Personally I run much less expo than even the advanced model (around 15% or less even) for more control.The current gyro sensitivity settings may be incorrect because I believe the DEVO settings are based on a 0 to 100 scale where the 9x is -100 to 100. The current values are 82% and 60% but I believe that it may need to be changed to 64% and 20%. Testing needs to be done.
- The throttle kill switch does what it is suppose to (-100 throttle and 0 collective pitch to help prevent boom strikes). Once set throttle kill can not be turned off until throttle stick is set to -100 and flight mode is idle down (ID0).
- ID switch sets the flight mode, ID0 for normal mode idle down, ID1 and ID2 for “stunt” idle up modes.
- GEAR switch sets the gyro sensitivity, 0/OFF/BACK is high sensitivity strong hold, 1/ON/FORWARD is less hold which helps with certain 3D maneuvers.
The Genius is using a 7 channel RX so you must be in 8 channel mode.
The channels:
- Channel 1 = Elevator
- Channel 2 = Aileron (needs to be inverted)
- Channel 3 = Throttle
- Channel 4 = Rudder (needs to be inverted)
- Channel 5 = Nothing (?)
- Channel 6 = Collective
- Channel 7 = Gyro sensitivity (?)
- Channel 8 = Nothing (?)
Do not use a “heli” setup on the 9x with swash mixing, the collective is done on channel 6. Do use the “swash ring” feature at about 80% otherwise the swash can bind.
Gyro sensitivity must be above 0 (on a -100 to 100 scale) otherwise the gyros are turned off. A low gyro value will make the tail have very fast response to stick input but it will not hold as well. A high gyro value will slow the tail down and have a more solid hold. If you go too high then the tail will wag/hunt a lot and not be stable.
When in 3 axis mode after binding make sure you have a solid green light on the Genius RX board. If not then that means you’re not sending a gyro sensitivity (channel 7) above 0 and flying like that is near impossible. In 6 axis mode the heli will drift and yaw badly if this gyro sensitivity setting is not transmitted. I have no idea how this transmitted gyro sensitivity interacts with the gyro sensitivity pots on the RX board (anyone know?).
Be careful about trim settings when doing the bind. Apparently the Genius RX will (sometimes? always?) remember some of these values (elevator, aileron, and rudder it seems) and offset the channels by whatever trim you had set during bind which essentially removes the trim or makes the trim too much or other adverse effects. In fact if you don’t send anything on channel 7 (for example you can use only 6 channels) then it’s possible to set up the trims in such a way while binding that the heli will sort of fly nicely in 6 axis mode without channel 7 (I don’t recommend this though). It’s weird, I haven’t quite figured out how it works.
Wow, it seems so simple now after all that I learned then writing this down. It was a real struggle for a while. Especially figuring out channel 7, before that I thought the GCP really sucked. It took lots of broken parts to bring this to you so feel free to send Genius CP blades, canopy, frame, etc.
7 responses to “DEVO TX module for the 9x”
mean is we can replace TX of Wakera ?
master cp, vd120, super cp …… all can control with this upgrade modul ?
It is great .
why you do not answer me ? i only want tell with you about RC
???????
Sorry, I missed your other post. Yes, it will work with any DEVO RX as far as I know. I have flown a Genius CP, Mini CP, and V120. The range is very limited though, around 30 meters.
hello Chris 🙂
i real want to make a tx devo 7e because i like suporting protocols from deviation.
i read in deviation how build a program for ARM on windows and Linux .But i real don’t understand whats they write .
So ,i hope you explain simple to i can make them .I bought all component to make it .STM32,Eprom,Lcd ……
i put thread on Deviation but nobody care.
plz help me .thank you very much
Quote from: anthony on September 06, 2014, 21:06:57
There are multiple targets available for building the Deviation firmware:
devo8: This is the default target for the Walkera Devention ‘DEVO8’ transmitter
It requires the gnu arm toolchain including gcc, and newlib
To build, use:
make
emu_devo8: This will build on the native platform (no cross-compiler needed)
The main purpose of this target is to facilitate GUI development.
This target requires FLTK to be installed. See below for
installing build enviornments
For Linux:
make TARGET=emu_devo8
For Windows:
make TARGET=emu_devo8 WINDOWS=1
Cross-compile for Windows on Linux:
make TARGET=emu_devo8 WINDOWS=1 CROSS=i586-mingw32msvc-
the default target is ‘devo8’
Installing the build environment:
#################################
Only the official embedded-arm build system is supported now
Get the most recent release from here:
https://launchpad.net/gcc-arm-embedded
Current build version: gcc-arm-none-eabi-4_8-2013q4-20131204
#################################
Building for ARM (on Linux):
1) download and install the precompiled linux compiler from here:
https://launchpad.net/gcc-arm-embedded
2) Add path to ‘bin’ directory to your PATH
Building for ARM (on Windows):
Install the arm toolchain:
1) download and install the precompiled windows compiler from here:
https://launchpad.net/gcc-arm-embedded
1a) add path to ‘bin’ directory to your PATH (I like to put this into ~/.profile
so it is there each time I start msys)
export PATH=/mingw/stm32/bin:$PATH
2) ensure python is installed. If not install it from here:
http://www.python.org/download/releases/2.7.3/
2a) Add python to your msys path:
export PATH=”/c/”:$PATH
(e.g. export PATH=”/c/Program Files/Python27″:$PATH)
#################################
#################################
Builing the Windows binary on Linux
Install fltk:
apt-get install mingw32 mingw32-binutils mingw32-runtime
./configure –disable-largefile –enable-localjpeg \
–enable-localzlib –enable-localpng \
–disable-gl –host=i586-mingw32msvc \
–prefix=/opt/fltk-w32
make
sudo make install
Install portaudio:
./configure –prefix=/opt/portaudio-w32
make
sudo make install
#################################
#################################
Building the Windows binary on Windows
#################################
Install MingW:
* Download the mingw installer from here: sourceforge.net/projects/mingw/files/Ins…0120426.exe/download
* Run the installer, and select ‘C++’, ‘MSYS’ and the ‘Developer Toolkit’
Install fltk:
* Download fltk from here: http://fltk.org/software.php?VERSION=1.3.0&FILE=fltk/1.3.0/fltk-1.3.0-source.tar.gz
* Start msys (you should have an icon, but otherwise run C:\MingW\msys\1.0\msys.bat
* mkdir src
* cd src
* Untar fltk: tar -xzf (you can get to your C: drive in mingw using /c/Users//Downloads for example)
* cd fltk-1.3.0
* ./configure
* make
* make install
Install portaudio:
* Download portaudio from here: http://www.portaudio.com/archives/pa_stable_v19_20111121.tgz
* Start msys (you should have an icon, but otherwise run C:\MingW\msys\1.0\msys.bat
* cd src
* Untar portaudio: tar -xzf (you can get to your C: drive in mingw using /c/Users//Downloads for example)
* cd portaudio
* ./configure
* make
* make install
Install Deviation:
* Download the source code for deviation. You’ll need mercurial to keep track of changes (which will require installing python), but you can manually download a zip of the source from bitbucket.org/PhracturedBlue/deviation
* cd ~/src
* cp -pf deviation
* cd deviation/src
Unfortunately I don’t have any experience with STM or even deviation really. It looks like the 7e is supported by Deviation. Do you have a 7e radio?
:'( i only have devo7 not devo 7e
devo 7 not supported firmware from deviation. unlucky
i only need file hex or bin to load program for STM32
but i tried , still can’t understand. i create thread there but nobody care to my questions , not reply
:-[
http://www.deviationtx.com/forum/7-development/3507-diy-devo-7e
I have never built Deviation myself so I’m not sure how to do it either. 🙁 It’s probably not very difficult if you can find some instructions. I was looking here: https://bitbucket.org/PhracturedBlue/deviation