https://github.com/c—/MultiWii3D
MultiWii simonk reverse motor test (for inverted flight)
This is my technique for making 3D props:
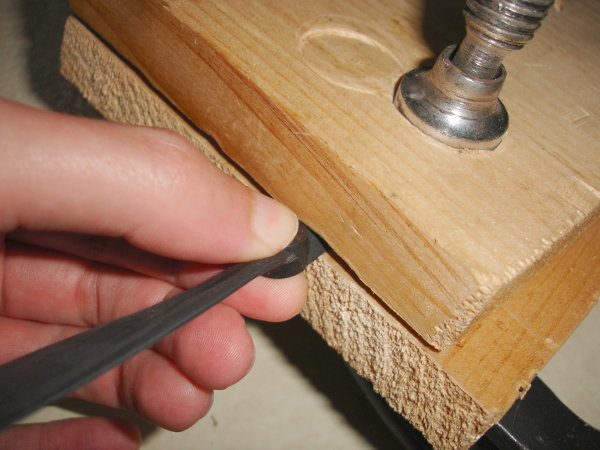
First I get two pieces of wood and a C-clamp. Then I heat up one side of the prop with a heat gun set on low. It actually doesn’t take that much heat. I keep the gun about 2 or 3 inches away, constantly moving it, I flip the prop over a few times to heat both sides, for about 15-20 seconds. Try not to heat up the center part of the blade, especially not the hub. Be careful about using too much heat for too long or the plastic will permanently bubble. This is probably highly dependant on your heat gun, use your own judgement but you will probably be surprised at how little heat it actually takes to make the prop soft, just work quickly.
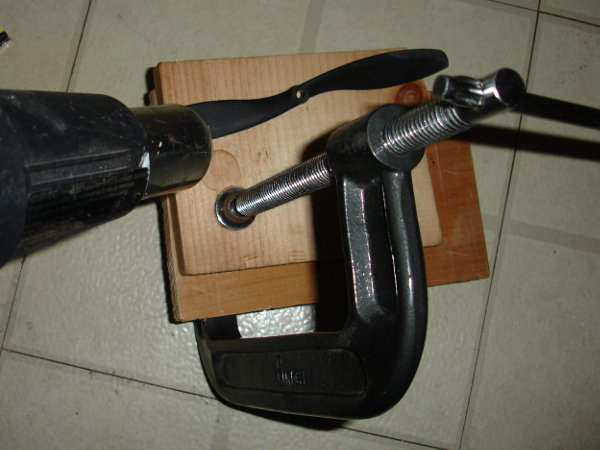
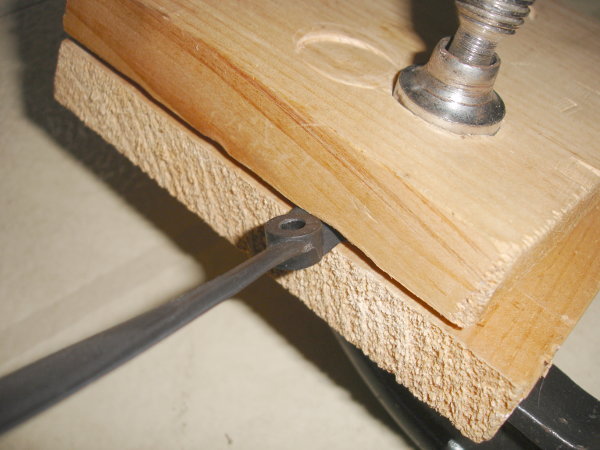
After the blade is hot I quickly and carefully slip it between the two pieces of wood then clamp down tightly with the C-clamp. The first time I’m only flattening the last 50% or so of the total blade length. I let it cool for 30 seconds or so in the clamp.
To make it easier to slip the prop between the wood I usually keep something else pushed in there as a spacer to hold the wood apart. I can then slip the prop in and remove the spacer.
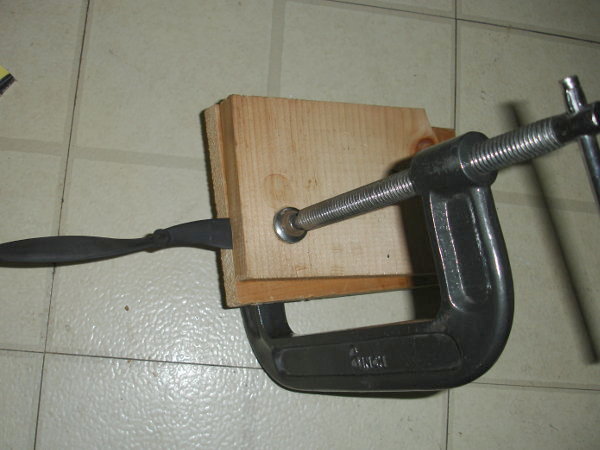
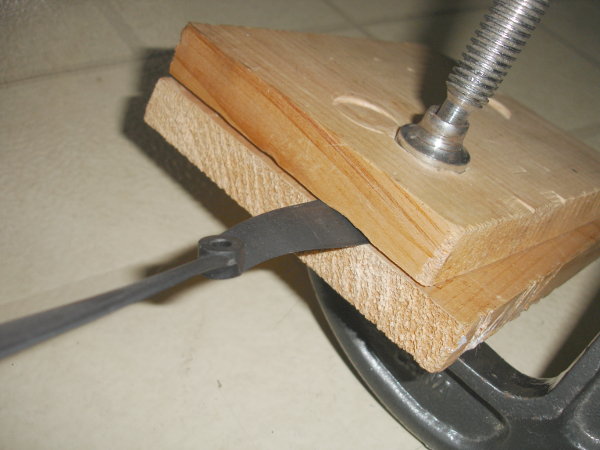
Next I remove the prop then heat it again. This time focusing more on the part of the blade closest to the hub. After it’s hot I fully insert it between the wood and clamp with the C-clamp. This will flatten the entire blade.
After the C-clamp is tight I twist the hub with my fingers (watch out, might be hot) to take out some of the pitch of the blade. I just hold it at what looks like a good angle until the prop cools down. If you don’t take out some of the pitch the blade will be angled way too much vertically which will create a lot of drag and little lift, this can also overload your ESC and/or motor.
Then I do the other side the same way. Once complete I examine the prop checking the angles and such. If anything is off or doesn’t look right I reheat and correct using the same techniques as above.
Finally I put the prop on a motor and run it up to speed in both directions with an ammeter on the battery. I check to make sure it’s not overloading the ESC and/or motor. As always, be careful when doing these types of tests. It’s easy to accidentally and unexpectedly get the motor running at full speed when running the reversible firmware.
3 responses to “MultiWii 3D”
hi chris .
you change the code for atmega8 use function reverse .
You can add function brake as soon as reverse , then is reverse.
i want use function for car , buggy 1/10 . I do not know you have play car ?
thank you very much
Hi! I am been flying now 1,5 years multiwii multirotors etc. Just started flashing 1,5 weeks ago esc´s first time.
I am happy if You could help a bit? Meaby I ve haven´t shearcing enough, but I flashed som esc´s with kkflashtool to 3D and those worked OK thottle channel of reciever.
But when We tried to setup multwii quad with 3D software multiwii2.2 , we were able to spin motors etc and put arming to one switch, but when dis arming motors runs negative?
We might miss something on software ?
wrong settings? or esc calibration is wrong?
We red some about cleaning esc calibration on flashing?
And middle thottle All motors didn´t stop? That´s why we couldn´t even try to tweak anything from transmitter
I am quite noob to this esc flashing still. Is there any proper video available?
Do MWC Crius SE board we triedfirts one or do 3D software work only on nanoboard?
I am glad I someone have time to hare links of some videos etc.
Sorry noobie questions, but really eager to try 3D 🙂
br, karri3nen
Hello karpo3
Which version of the simonk firmware are you using?
If using the older 2012 firmware then the ESC’s must not be calibrated. If they have been calibrated then the settings must be erased with the EEPROM_wipe.hex file. I’m not sure if this can be done with the kkflashtool because you need to flash the EEPROM, not the flash area (default).
If using the newer firmware then I’m not sure what the problem is because the firmware is suppose to disable calibration (maybe it doesn’t work).